6.6.9 Building the SecureSFX Installer
6.6.11 Building the SecureSFX Installer
Building the SecureSFX Installer:
5 Steps are required to build a fully-optioned SecureSFX.
Only 1 step is required if you want to build a SecureSFX with default options!
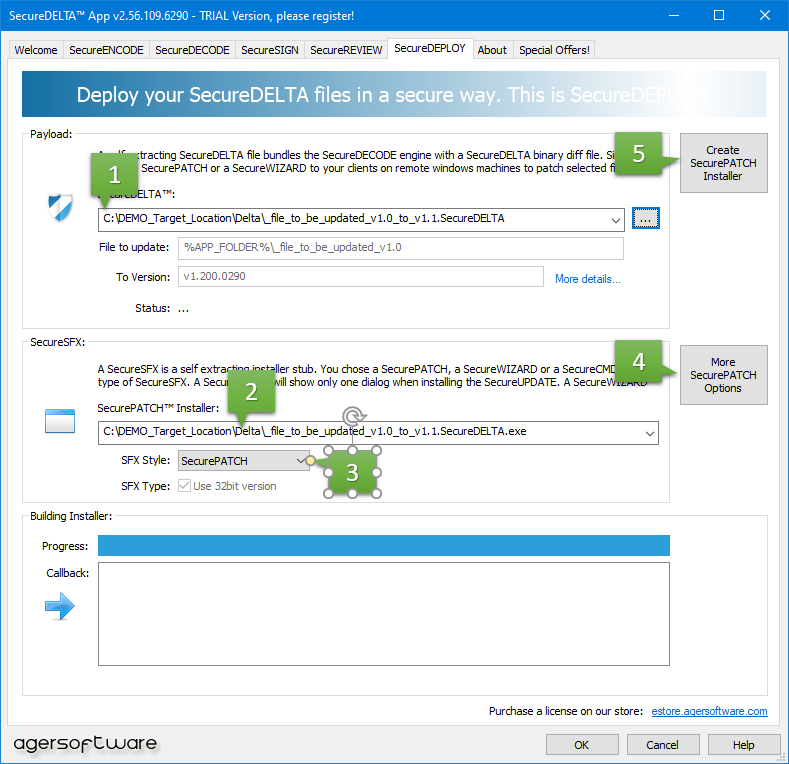
Here are shortly, the steps with their own description below:
STEP 1: Add payload name (SecureUPDATE file)
STEP 2: Edit SecureSFX name and output location
STEP 3: Change SecureSFX type (SecureCMDLine, SecurePATCH, SecureWIZARD)
STEP 4: Change Customer information
STEP 5: Press Create... button
In more details:
STEP 1: In order to create the SecureSFX Installer, you need to do select a payload - a SecureUPDATE file (SecureDELTA or XtremeDELTA)
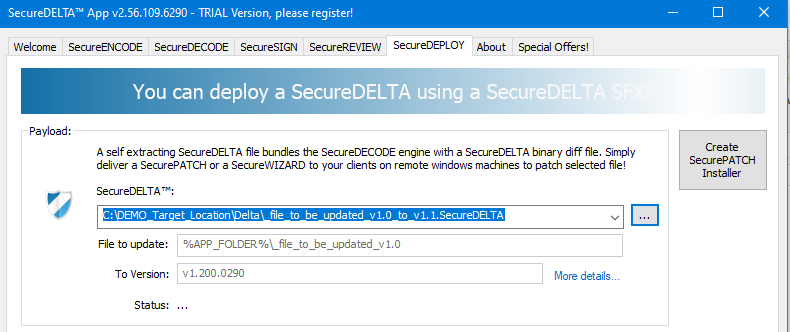
Once a SecureUPDATE file has been loaded, it will be decrypted and a brief information will be displayed. This information relates to "File that will be Updated" and the "Version to be Updated To".
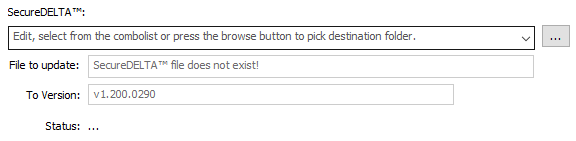
The placeholder for SecureUPDATE will also inform you to "Edit, select from the combolist or press the br...."
STEP 2: The second part of the window will allow you to input or edit the name of the SecureSFX file, and its location:

STEP 3: You may also change the type of the SecureSFX file, SecurePATCH, SecureCMDLine or SecureWIZARD:
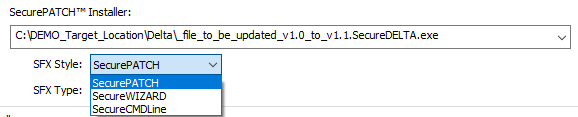
Please note: for the 32it version you may only chose 32bit version - decoder engines.
STEP 4: Change the user -options if needed. See here.
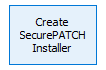
STEP 5: If SecurePATCH is selected, the MakeSFX button changes to "Create SecurePATCH Installer":
If the SecureUPDATE file is signed, the following message box appears:
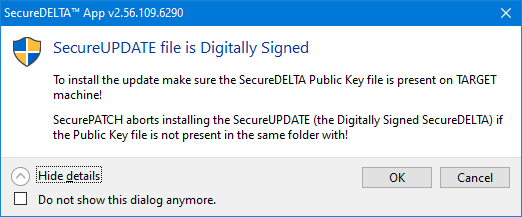
You may press the Do not show this dlg anymore or simply abort the process by pressing Cancel.
Pressing Yes will start the SFX Building process, and its following callback messages will be displayed in the lower window on this page.

The more details link will jump automatically to the SecureREVIEW page
After SecureSFX is created with the specified path, there you will see the output file:
